Highlighting and contouring enhance facial features using makeup. This tutorial provides clear steps for a flawless look.
Highlighting and contouring are key techniques in makeup artistry. These methods enhance your natural bone structure and add dimension to your face. Properly applied, they can create the illusion of higher cheekbones, a slimmer nose, and a more defined jawline.
To achieve this, you need the right products and tools, such as a contour stick, highlighting powder, and blending brushes. This tutorial breaks down the process into simple steps, making it accessible even for beginners. Whether you’re preparing for a special occasion or updating your daily routine, mastering these techniques can elevate your makeup game to a professional level.
Introduction To Sculpting Features
Highlight and contour can change your look. Highlighting brings out your best features. Contouring adds shadows to give your face depth. Together, they create a balanced look. This technique can make cheeks look higher. It can also make your nose look slimmer. Learning this skill can boost your makeup game.
| Tool | Purpose |
|---|---|
| Highlight Powder | Adds brightness to high points |
| Contour Powder | Creates shadows for depth |
| Blending Brush | Softens harsh lines |
| Beauty Sponge | Blends products smoothly |
| Setting Spray | Keeps makeup in place |
Choosing The Right Products
Cream formulas blend smoothly on the skin. They give a natural and dewy finish. Powder formulas are great for oily skin. They provide a matte look and last longer. Creams are ideal for dry skin types. Powders work best for normal to oily skin. Using both can give a balanced look. Try to experiment with both to see which suits you.
Choosing the right shade is important. Use a shade two tones darker to contour. For highlighting, use a shade two tones lighter. Fair skin should use cool-toned shades. Medium skin looks best with warm tones. Deep skin should go for rich, warm shades. Test products on your jawline to match your skin tone. Blending well is key to a natural look.
Prepping Your Canvas
Clean skin helps makeup stay longer. Use a gentle cleanser to wash your face. Exfoliate to remove dead skin cells. Apply a moisturizer to keep skin hydrated. Hydrated skin looks smooth and healthy.
Primer creates a smooth base for makeup. It fills in pores and fine lines. Apply a small amount on your face. Use your fingers or a brush to blend. Wait a few minutes before applying foundation.
Credit: www.100percentpure.com
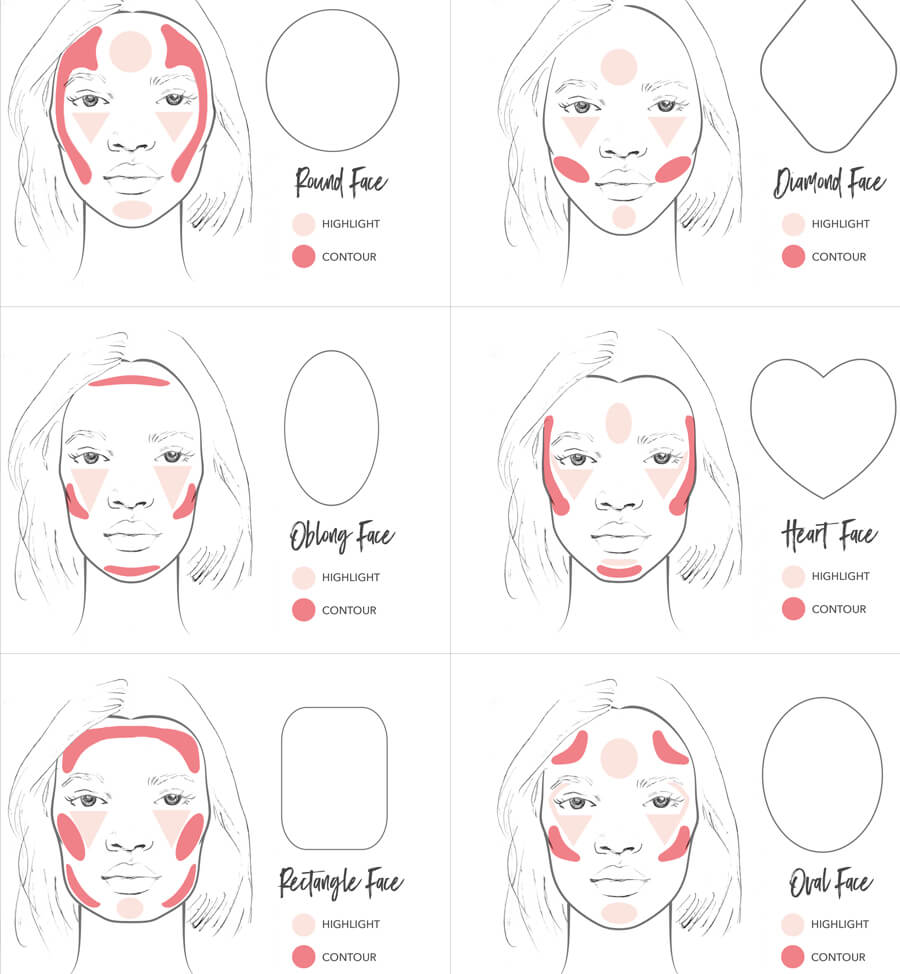
Mapping Your Face
Face shapes can be round, oval, square, or heart-shaped. Identifying your face shape helps in applying makeup correctly. Round faces are wide with soft edges. Oval faces are longer with a curved jawline. Square faces have strong jawlines and broad foreheads. Heart-shaped faces are wider at the forehead and narrow at the chin.
Highlight the high points of your face. These include the tops of your cheekbones, the bridge of your nose, and the center of your forehead. Contour the areas you want to define. These include under the cheekbones, along the jawline, and the sides of your nose. Use a lighter shade for highlighting and a darker shade for contouring. Blend well to avoid harsh lines.
Mastering Highlight Techniques
Apply a light concealer under your eyes. Use a small brush or your fingers. Blend the concealer gently. It will make your eyes look awake and fresh. Choose a shade lighter than your skin tone. This trick can hide dark circles.
Use a highlighter on top of your cheekbones. Draw a line from the middle of your ear to the eye corner. Blend it well. Your cheekbones will look higher and more defined. Pick a shimmering highlighter for a glowing look.
Apply a thin line of highlighter down your nose bridge. Start from the top and stop before the tip. Blend it softly. It will make your nose look straighter and slimmer. Use a small brush for precision.
Contouring Like A Pro
To define the jawline, use a darker contour shade. Apply it along the edge of your jaw. Blend well to avoid harsh lines. This will create a sharper, more defined jawline.
For sculpted cheeks, find the hollows of your cheeks. Apply contour from your ear to mid-cheek. Blend upwards for a natural look. This creates depth and enhances cheekbones.
To refine your nose, use a small brush. Apply contour along the sides of the nose. Blend carefully to avoid harsh lines. This will make your nose appear slimmer.
Blending: The Key To Natural-looking Contours
Achieve flawless contours with expert blending techniques. Effortless blending ensures natural highlights and contours for a seamless look. Master the art of subtle transitions for stunning results.
Tools And Techniques For Seamless Blending
Brushes and sponges work best for blending. A damp sponge can soften harsh lines. Brushes help in detailed areas. Use a light hand to blend. Circular motions create a smooth finish.
Choose quality tools for better results. Clean tools give a flawless look. Practice makes your technique perfect. Always blend in natural light.
Common Blending Mistakes To Avoid
Avoid using dirty brushes. Dirty tools cause patchy blending. Do not use too much product. Excess product looks cakey. Blend in small sections for control. Rushing can ruin your look.
Over-blending can erase your work. Blend just enough to soften lines. Match your contour shade to your skin tone. Wrong shades look unnatural. Always check your work in natural light.
Setting Your Masterpiece
Picking the right setting powder is key. Translucent powders are great for all skin tones. They help to set your makeup without changing its color. Tinted powders match your skin tone and add extra coverage. Loose powders are best for oily skin. They absorb oil and reduce shine. Pressed powders are easy to carry. They are perfect for quick touch-ups.
Apply setting powder after foundation and concealer. Use a fluffy brush for even coverage. Press the powder into your skin for a long-lasting effect. Focus on areas that get oily. Don’t forget your T-zone. Use a smaller brush for under your eyes. This prevents creasing. Finish with a setting spray for the best hold.
Advanced Tips And Tricks
Daytime contouring should be light and natural. Use a matte bronzer for a subtle effect. For evening events, go for a more dramatic look. Apply a darker shade under your cheekbones. Add highlighter on the highest points of your face.
Balance is key in contouring. Always start with a small amount of product. Gradually build up the intensity. Make sure both sides of your face look even. Use a blending brush to soften any harsh lines. Symmetry enhances your natural beauty.
Troubleshooting Common Issues
Over-contouring can make your face look harsh. Use a clean brush to blend it out. Blending helps to soften harsh lines. Apply a bit of foundation over the contour. This will neutralize the color. Always start with less product. You can add more if needed. This way, you avoid over-contouring.
Oxidation makes your makeup look darker. Choose products labeled oxidation-resistant. Test the product before buying. Apply it on your wrist and wait. Check if the color changes. Store makeup in a cool, dry place. Heat can cause oxidation. Use a primer to create a barrier. This can help prevent oxidation.
Highlight And Contour For Different Skin Types
Oily skin needs special care. Use matte products to avoid extra shine. Oil-free foundation works best. Set your makeup with translucent powder. This keeps the oil at bay. Choose a matte bronzer for contouring. Matte bronzers do not add extra shine. Use blotting papers during the day. Blotting papers help control oil. Always carry them in your bag.
Dry skin needs hydrating products. Use a moisturizing primer first. This helps the makeup stay smooth. Choose a cream-based foundation. Cream foundation adds moisture. Use a liquid highlighter for a glow. Liquid highlighter looks natural. Set your makeup with hydrating spray. Hydrating spray keeps your skin fresh. Avoid powder products. Powder can make skin look dry.

Credit: www.dancecompreview.com
Final Touches
Apply blush to the apples of your cheeks. Use a soft, fluffy brush for blending. Choose a color that matches your skin tone. A pink or peach shade works well for fair skin. For darker skin, opt for deeper shades. Sweep bronzer along your hairline, jawline, and cheekbones. This adds warmth to your face. Blend well to avoid harsh lines. A matte bronzer is best for a natural look. Make sure to blend the blush and bronzer together.
Check your makeup in natural light. This helps to spot any unblended areas. Use a clean brush to blend any harsh lines. Add a bit more blush or bronzer if needed. Ensure both sides of your face look even. Lightly spray a setting spray to keep your makeup in place. This helps your look last all day.
Practice Makes Perfect
Start by practicing your contour and highlight every day. Use a mirror with good lighting. This helps you see where the shadows fall on your face. Keep your brushes and products clean and organized. It makes your routine faster. Follow a step-by-step process. This builds muscle memory. Soon, you will be able to contour and highlight quickly and easily.
Don’t worry if you make mistakes. Everyone does at first. Use your mistakes to learn. Try different techniques and see what works best. Take note of what doesn’t work. Adjust your routine based on your findings. Over time, you will improve. Your skills will become more refined. Remember, practice makes perfect.
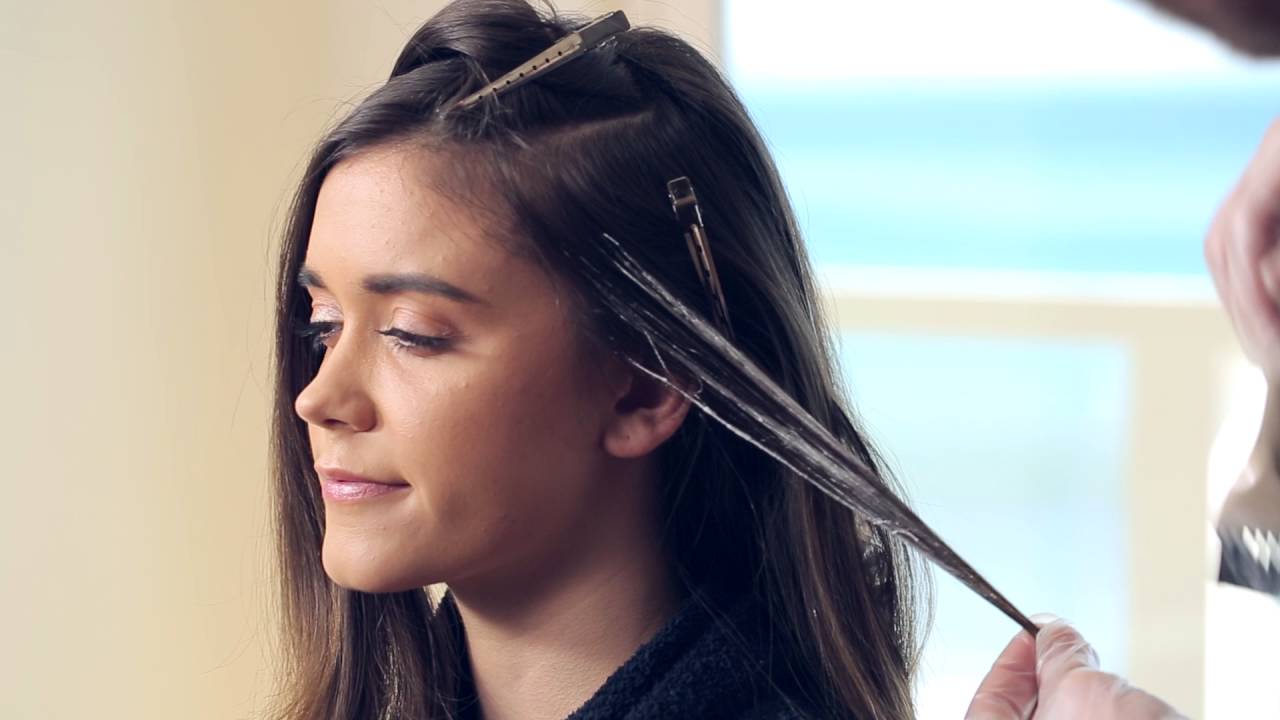
Credit: www.youtube.com
Frequently Asked Questions
How To Contour And Highlight For Beginners Step By Step?
Start with a clean, moisturized face. Apply foundation evenly. Use a darker shade to contour cheekbones, jawline, and forehead edges. Highlight the tops of cheekbones, bridge of the nose, and brow bones with a lighter shade. Blend well for a natural look.
Set with translucent powder.
Does Contour And Highlight Go On Before Foundation?
Contour and highlight typically go after foundation. Applying foundation first creates a smooth base. This helps products blend better.
What Is The Rule To Follow When Highlighting And Contouring?
Highlight high points like cheekbones and nose. Contour hollows like under cheekbones and jawline. Blend well. Use minimal product. Select shades matching your skin tone.
Does Contour Go Above Or Below The Cheekbone?
Contour should go below the cheekbone. Apply it in the hollows of your cheeks for definition. Blend well for a natural look.
Conclusion
Mastering highlight and contour can transform your look. Practice makes perfect, so keep experimenting. Use quality products for best results. Follow these steps to enhance your natural features effortlessly. Share your progress and tips with us. Happy contouring!